This practical guide shows how to turn a messy electronics area into a tidy, safe living space you can actually use every day.
By cable-free setup we mean fewer visible cords, fewer trip hazards, and a layout that stays tidy without constant fuss. It is not about showroom photos. It is about a real-life system that is easier to clean, upgrade, and troubleshoot.
You’ll get a quick tour of common areas: desks and desktop gear, standing desks, TVs and wall runs, kitchen counters, charging docks, and basic smart-home gear. I’ll call out usual constraints like limited outlets, bulky power bricks, and renter limits on drilling.
This guide will help you pick the right tools, route power sensibly, and avoid mistakes that cause heat, wear, and tangles. I will include budget and premium options. You’ll also learn small high-value habits like labeling, leaving slack for movement, and monthly quick checks.
Key Takeaways
- Define a practical cable-free approach for daily living.
- Focus on safety, energy savings, and renter-friendly fixes.
- Plan routes for desk, TV, kitchen, and charging docks.
- Choose tools by budget and long-term value.
- Adopt simple habits: label, leave slack, check monthly.
Why a cable-free setup matters beyond looks
A tidy electronics area is more than looks; it protects people, devices, and your home. Manage cords with safety and practical rules in mind. That focus helps you avoid common, avoidable problems.
Safety first: loose cords across walkways are trip hazards in small apartments and shared rooms. A caught cord can yank a monitor or laptop off a desk. Damaged jackets and crushed adapters raise real fire risks. Regular checks avoid those issues.
Heat and airflow
Power bricks and adapters need air. When adapters sit piled in a bin or under a heap of wires, they run hotter and age faster. Don’t bury hot adapters. Give them space to breathe and keep them off soft surfaces.
Stability and signal
Bundling power and data too tightly can invite flicker, dropouts, or odd behavior. If power and data must cross, cross them at a right angle and keep runs short. This simple routing cut keeps signals steadier.
„A neat arrangement won’t magically boost every device, but it reduces accidental disconnects, heat stress, and troubleshooting time.“

| Concern | What happens | Quick fix |
|---|---|---|
| Trip hazards | People catch cords in walkways | Route along walls; use covers |
| Overheated adapters | Adapters fail or pose fire risk | Ventilate, avoid buried power bricks |
| Signal issues | Flicker, dropouts, interference | Separate power and data; cross quickly |
Keep expectations realistic. Good management and tidy runs reduce clutter and risk, but they won’t fix a failing device. For practical product ideas and renter-friendly tricks, check a tested resource like this home problem solver guide.
Real benefits you’ll actually notice in daily life
Small daily wins add up when your desk area stops being a knot of wires. You spend less time moving a tangle before you vacuum. That one change cuts cleaning time and dust build-up instantly.
Faster cleaning: fewer cords on the floor means you can vacuum under your desk and behind media stands without dismantling a nest first.

Quicker troubleshooting
Label both ends of each cord so you can identify the right connection fast. When something stops charging, you unplug the correct cord without guessing.
More usable space in small apartments
Clean edges and fewer stray cords free narrow walkways. Rooms feel less cramped and safer for pets and family.
- Mental clarity: less visual noise reduces small irritations during work and downtime.
- Future you: a logical layout makes upgrades and new devices faster to add.
- Honest note: the first tidy takes time, but upkeep afterward is easy.
| Benefit | What you notice | Quick action |
|---|---|---|
| Cleaning | Less dust, faster vacuuming | Lift cords off floor; use clips |
| Troubleshooting | Find and fix faults faster | Label both ends of each cable |
| Space | Wider walkways, neater look | Route runs along walls and under desks |
Who needs this and who can keep it simple
Start by matching your living situation to practical cord solutions that won’t require renovations. That helps you pick renter-friendly options and avoid wasted effort.
If you rent: use external raceways, adhesive clips, and furniture paths along the wall. These options respect lease limits and reduce trip hazards without drilling.
If you work from home or game: multiple devices and an extra monitor mean more power and data runs. Mountable strips, labeled runs, and a small under-desk tray save time and frustration.
Families and pet owners: loose cords on the floor are chewable and pullable. Keep cords off walkways, use covers, and prioritize safety over looks.
- If your needs are minimal—a phone and laptop—stick to a simple dock and one tidy power area.
- If you create content, add ventilated trays and anchored raceways for microphones, lights, and capture gear.
Noise matters: buzzing adapters near a bed or desk can ruin sleep. Move noisy bricks away from quiet zones.
Quick ID: Not ready to open walls? Compare renter-friendly options here.

What “cable-free” really means for home electronics
“Cable-free” usually means hidden or contained runs, not that devices stop needing power. You still plan for adapters, bricks, and points where cords must reach outlets.

Hidden cables vs fewer cables: setting realistic expectations
Hiding cables reduces visible mess. Reducing cables lowers duplication and tangles.
Shorter leads and fewer chargers cut loops. But most electronics still need a power source and occasional access for swaps or resets.
Where cords can’t disappear: power needs and outlet reality
If two wall plugs must serve six devices, a power strips hub is inevitable. That hub becomes your planning center for ventilation and access.
„Concealment should not block airflow. Ventilated trays keep power bricks cool and lasting.“
| Approach | Pros | Cons |
|---|---|---|
| External raceways | Accessible, renter-friendly | Visible runs; moderate install |
| In-wall runs | Clean look; minimal visible wires | Involved, may need electrician |
| Power hub under desk | Centralized, easier troubleshooting | Needs space and ventilation |
Match a solution to your space and devices. Check compatibility with textured walls, standing desks, and thick baseboards before you buy. That avoids wasted parts and makes management worth it.
Plan your cable management layout before you plug anything in
Take ten minutes to sketch where your devices live and how power will reach them. A quick map stops guesswork and helps you buy the right lengths and tools.
Map your devices: list desktop gear, TV gear, kitchen gadgets, chargers, and smart home hubs. Note each device’s usual spot and how often you move it.

Choose short, practical lengths
Pick the shortest cables that still allow access. Short runs cut loops that trap dust and snag chairs. If you need movement, leave a small service loop rather than excess slack.
Pick a single power hub
Choose one central hub behind a desk, inside a console, or near a counter corner. That reduces cords crossing walkways and keeps power strips and bulky adapters in one ventilated spot.
Separate power and data
Route power cords one way and HDMI/USB/Ethernet the other. Keeping them apart lowers interference and odd flicker. Label both ends to speed troubleshooting and upgrades.
Energy and renter-friendly checks: group rarely used devices on a switchable strip so you can cut standby power easily.
| Plan step | Quick action | Why it helps |
|---|---|---|
| Device map | List and place each device | Avoids wasted parts and rework |
| Measure | Check desk wall, baseboards, outlets | Ensures raceways and trays fit |
| Power hub | Pick one ventilated location | Reduces crossing wires and heat |
Plan first: spending 10–20 minutes now saves hours later and keeps your small space practical and safe. For renter-friendly ideas and tested parts, see renter finds and tips.
Tools and supplies that make a cable-free setup easier
A handful of well-chosen supplies will save you time and headaches later. Pick practical, renter-friendly items that match how often you change gear and how much space you have.

Cable ties vs reusable wraps
Zip ties hold bundles tight and look neat. They are low-cost but permanent. Use them for long runs you won’t change.
Reusable ties or Velcro straps cost more but let you add or move devices without cutting anything. Don’t over-tighten any tie; you guide wires, you don’t squeeze them.
Adhesive clips and where they fail
Adhesive cable clips are great on clean, smooth surfaces. They are renter-friendly and easy to place.
They often fail on textured walls, dusty undersides of desks, or humid kitchens. Test one clip before you commit to a full run.
Raceways, covers, sleeves, and trays
Raceways are paintable plastic channels that hide runs along a wall without opening drywall. They are a simple renter-friendly option.
Floor cord covers work across doorways but take space and can trap dirt if placed poorly.
Sleeves bundle many lines neatly. Pick split or zipper styles so you can add cables without rebuilding the whole bundle.
Under-desk trays are the “grown-up” move. They hold power strips and adapters off the floor, free legroom, and make maintenance easier.
Labels and management boxes
Label both ends of each cable so troubleshooting and upgrades take minutes instead of long searches.
Management boxes hide strips and bulky adapters. Leave ventilation and avoid packing hot bricks tightly to prevent heat buildup.
„Measure first: check desk depth and your power strip length before you buy a tray or box.“
| Tool | Pros | Cons |
|---|---|---|
| Zip ties | Tidy, cheap | Permanent; can damage jackets |
| Reusable ties | Flexible; easy changes | Higher cost per unit |
| Adhesive clips | Renter-friendly; easy install | Fail on rough or dirty surfaces |
| Raceways / covers | Clean look; paintable | Visible strip; needs measuring |
| Under-desk trays | High capacity; safer | Requires mounting; check fit |
Budget vs premium options: what’s worth paying for
Deciding how much to spend starts with a clear goal: safety and ease, not showroom looks. Set that goal first and you avoid impulse buys that add little value.

Budget wins
For small apartments, low-cost options solve many problems fast. Adhesive clips and simple sleeves clean a desk and reduce visible cables.
Those clips and cable clips work well on smooth surfaces. They are renter-friendly and cheap to replace.
Premium upgrades
Pay for ventilation and load capacity when you have multiple power bricks. Ventilated trays and sturdier mounts keep adapters cool and accessible.
Higher-end raceways look cleaner, hold more weight, and last longer than basic strips.
Best value by scenario
Small desks often get the most from a tray plus a few clips. Media consoles benefit from raceways and a management box that hides bulk.
| Option | Pros | Cons |
|---|---|---|
| Budget | Cheap, flexible | Adhesive can fail; low capacity |
| Mid | Good balance of cost and durability | May need drilling for mounts |
| Premium | Ventilation, weight support | Higher cost and larger space needs |
Worth it rule: if you use several adapters daily, pay for ventilation and proper management.
Setup time: how long a cable-free setup takes in real homes
Plan realistic time blocks so the task fits your evening, not your weekend. A clear plan saves effort and rework.

Quick tidy: laptop + phone corner
Typical time: under 30 minutes. One power strip, a short run of clips, and a label usually do the job.
Typical desk wall or desktop work
Typical time: 60–120 minutes. Expect to mount a strip, route monitor and USB runs, test each device, then secure and label.
TV wall routing
External raceways: about an hour for a neat, renter-friendly run. In-wall concealment: more time, patching, and possibly a pro.
Standing desk considerations
Allow extra minutes to test motion and set a service loop for slack. This prevents stress on connectors and reduces future faults.
Practical workflow: route, connect, test, then secure and label. Don’t rush. Bundling before testing often wastes time.
| Task | Typical time | Difficulty |
|---|---|---|
| Charging corner (laptop + phone) | 15–30 min | Easy |
| Desktop / desk wall | 60–120 min | Medium |
| TV with raceway | 45–90 min | Easy–Medium |
| In-wall TV routing | 2+ hours | Hard (may need pro) |
| Standing desk motion testing | Add 15–30 min | Medium |
Desk and desktop cable-free setup for work and gaming
A practical desk plan keeps your legs clear and your gear reliable during work and play.
Route toward the back edge. Run all cords and power leads along the rear lip of the desk. This keeps your legs and a rolling chair from hitting lines. It also reduces accidental disconnects and tangles.

Mount power strips where you can reach them
Mount strips under the rear of the desk or on a vertical brace. Strips on the floor slide, collect dust, and are easy to kick or unplug by accident.
Usability tip: place the strip so you can reach the switch and outlets without crawling under the desk.
Protect monitors, USB, and Ethernet runs
Avoid tight bends near connectors. Gentle curves reduce stress and random disconnects. Use short ties or clips to guide monitor and USB leads without pinching them.
For Ethernet, add a small strain relief loop so a tug on the desk or chair doesn’t yank the connection out during a meeting or match.
Practical habits and troubleshooting
- Group gaming-only gear on one strip so you can cut power when not in use.
- Separate power and data runs where possible to reduce flicker or interference.
- Label both ends of problem-prone cords to speed fixes.
„Organized runs reduce accidental disconnections and make upgrades faster.“
| Action | Why it helps | Quick tip |
|---|---|---|
| Back-edge routing | Protects legroom and reduces snags | Use adhesive clips every 12–18 inches |
| Mounted strips | Improves safety and access | Mount under desk rear; keep switch reachable |
| Gentle bends | Extends connector life | Avoid 90° turns at plugs |
For tested parts and tools that work well on desks, see this practical guide from Tom’s Guide: desk organization tips and tools.
Standing desk cable routing that won’t snag or break
When your desk rises and lowers each day, tight runs turn into future faults unless you plan slack and routing. Standing desks need motion-aware routing so connectors never carry the load.

The service-loop rule
Leave a 20–30 cm visible service loop for sit‑stand desks with ~60 cm travel. Make an S‑curve so the loop absorbs movement, not the plug or jack.
Quick test: raise and lower the desk several times while watching the loop. If any lead tightens or tugs at a connector, add slack.
Cable spine vs sleeves for vertical movement
A cable spine is built for vertical travel and prevents kinking. Sleeves tidy many lines but can tug if packed too tight. For frequent motion, prefer a spine or a loosely wrapped sleeve.
Stress points to watch
Inspect where lines exit the desk, around sharp corners, and near rolling chairs. Those spots cause most wear and eventual damage.
- Use soft ties; don’t cinch hard.
- Space tie points so lines move naturally.
- Keep connectors clear of edges and pinch zones.
Dialing in a standing desk takes extra minutes but avoids replacing cords and adapters later. For a tested, practical guide on managing runs for adjustable desks see cable management for standing desks.
TV and wall setups: hiding cables safely without overcomplicating it
Mounting a TV looks best when lines follow a clear path. You can get a tidy result without full remodels. Focus on safe, renter-friendly choices first, then consider harder options only if they’re worth the cost and effort.

External raceways: renter-friendly and practical
Plastic raceways attach to paint-safe walls and let you hide cables along a wall without cutting drywall. They are fast to install and easy to remove when you move.
Raceways are visible up close but look clean from normal viewing distance. Prep the surface first; adhesive can fail on dusty or textured paint. If adhesive worries you, use the screw-mount option on a test strip.
When in-wall routing makes sense
In-wall routing gives the cleanest look. It requires planning, cutting access holes, fishing wire, and using in-wall rated cables. Finish with wall plates so the TV and outlet meet code and look professional.
Safety note: local codes vary. If you plan to run power inside a wall, confirm rules or hire a licensed electrician. That avoids hazards and failed inspections.
Low-effort options: use existing channels and furniture
Before cutting or mounting, check baseboards, molding channels, and furniture paths. Running a wire behind a console or inside a hollow baseboard reduces work and keeps the route hidden.
If you need a quick guide for a neat renter-friendly TV run, see this practical how-to on how to hide cords neatly behind a TV stand: hide cords behind a TV stand.
„Choose a path that stays accessible and won’t tug when you move the console or vacuum behind it.“
| Approach | Pros | Cons |
|---|---|---|
| External raceway | Quick install; renter-friendly | Visible on close inspection; adhesive can fail |
| In-wall routing | Cleanest look; minimal visible lines | Requires planning, in-wall rated wire, and possible electrician |
| Existing channels / baseboards | Low effort; uses what you have | May limit routing options; less clean than in-wall |
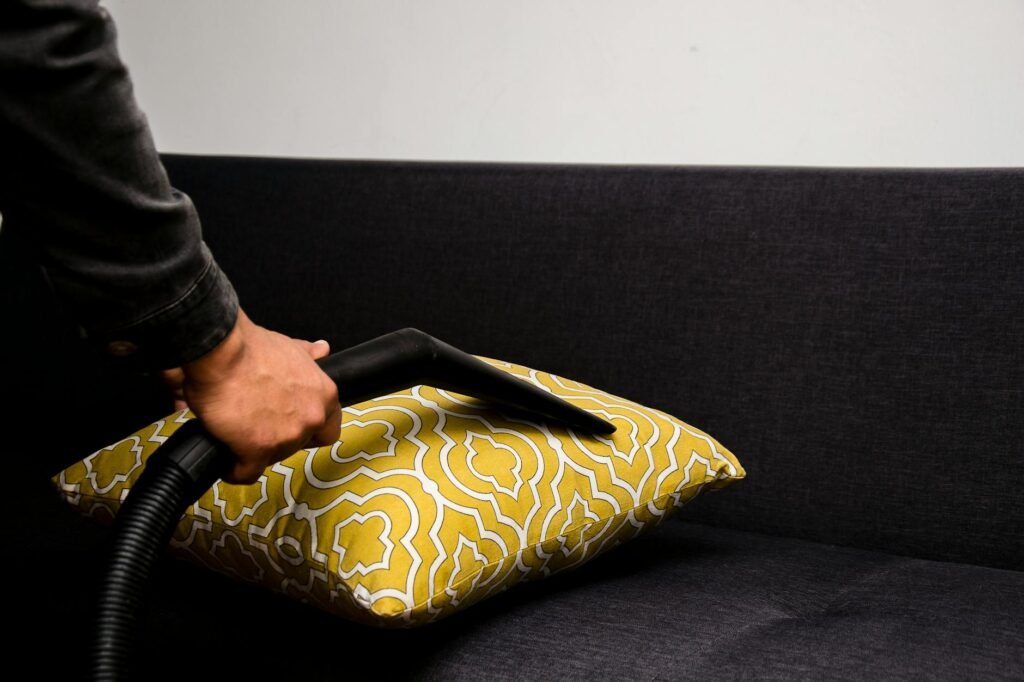
Kitchen cable-free setup: small appliances, chargers, and counter space
Kitchens need practical routes for power that keep counters usable during real cooking. Clear surfaces make prep safer and faster. Plan for a few reachable outlets rather than one cluster that steals usable space.

Keep cords away from heat, water, and prep zones
Run cords so they never cross the sink or hob. Wet surfaces and hot plates are the biggest hazards. Tuck leads behind a microwave stand or route them down a side wall away from splashes.
Space and placement for strips and power
A slim power strip can solve outlet shortages, but it needs its own space. Mount strips under an upper cabinet lip only if the area stays dry and ventilated.
Good small-apartment spots: behind a microwave, under a counter overhang, or on a low side wall. Keep the strip accessible so you can switch things off fast.
Energy-saving, heat, and daily practicality
Group rarely used appliances on one switched strip so you can cut standby draw at night. Don’t pile adapters together in a tight corner.
Piled bricks trap heat near warm appliances. Give each adapter room to breathe to extend life and reduce risk.
| Kitchen need | Practical action | Why it helps |
|---|---|---|
| Counter clarity | Route cords behind appliances | Frees prep space and reduces trips |
| Outlet shortage | Use a mounted strip in a dry spot | Makes power reachable without blocking counter |
| Energy waste | Put rare items on a switched strip | Cuts standby draw and saves energy |
| Heat control | Space adapters; avoid tight corners | Improves airflow and device life |
For practical, tested tips on keeping kitchen lines tidy and safe, see a focused guide on getting a cord-clutter-free kitchen: cord-clutter-free kitchen.
Cleaning gadgets and daily electronics without cord chaos
A small, dedicated charging corner saves space and prevents cords from wandering across floors. Pick one predictable spot so vacuums, mops, and handheld devices always return to the same place.

Docking zones that reduce clutter
Set a single docking zone. Use a shelf, closet nook, or behind a side table. This stops scattering chargers around the home and avoids runs across walkways.
Noise levels and placement
Some docks and adapters hum or have bright indicator lights. Keep noisy or lit docks away from bedrooms. A ventilated closet or hallway nook works well in small spaces.
Maintenance that matters
Dust around docks and strips so vents stay clear. Check for frayed jackets, bent connectors, and hot-to-the-touch adapters—these signs mean replace the cable or cord before it fails.
- Why it helps: organized docking reduces wear from rolling chairs and foot traffic.
- Keep safe: never run charging lines under rugs or pinch them under furniture where damage goes unnoticed.
- Quick routine: monthly dusting, test plugs for heat, and tighten loose connections for simple management.
Smart home basics: wireless convenience without new mess
Before you buy another gadget, decide where it will live and how it will draw power without adding mess. A little planning keeps your smart purchases practical and renter-friendly.
Power consumption reality: Most always-on hubs, cameras, and speakers draw continuous power. That adds small ongoing usage and can create a hot spot if adapters are crowded together. Plan ventilation and put always-on items near a ventilated hub area.
Small-apartment placement: Fewer devices placed well usually beats many scattered gadgets. Put your main hub near the router and an outlet so wireless range and latency stay good. Keep speakers and cams away from bedrooms if lights or sounds will disturb sleep.

Simple compatibility checks
Confirm plug type and required cable length before you buy. Check mount fit and surface compatibility for adhesive or screw mounts. That avoids returns and last-minute hacks that add clutter.
- Choose one system area: one hub spot, one charging corner, and one path for cords keeps growth under control.
- Reduce extras: skip duplicate devices that overlap function. One reliable device is often better than three partial ones.
- Watch noise and lights: test for hums and LEDs before final placement.
„A tidy smart home trades gadget quantity for smarter placement and clearer power planning.“
Common mistakes that ruin a cable-free setup
Small mistakes in a tidy plan can quietly undo hours of work and invite hazards. This short list points to the usual faults and easy fixes so you keep your area safe and stable.

Over-tightening zip ties and damaging wires
#1 error: pulling zip ties so tight that jackets kink and stress conductors. Over time you get intermittent faults or failed connectors.
Loosen bundles, use reusable ties, and leave gentle curves. That prevents hidden wear and saves you replacement time.
Burying power bricks without ventilation
Stuffing adapters into boxes or under piles traps heat. Hot bricks age faster and can fail or get too warm to touch.
Give power items airflow or swap to a ventilated tray. That small change extends life and reduces risk.
Mixing power and data bundles
Running power and HDMI/USB tightly together invites flicker, dropouts, or odd glitches.
Route them separately or cross at right angles to keep signals stable and reduce troubleshooting.
Skipping labels
Not labeling both ends turns every change into a detective job. You waste minutes—sometimes hours—tracing which line goes where.
Label now; thank yourself later when swaps and upgrades take less time.
Relying on weak adhesive on textured or dusty surfaces
Adhesive fails on rough paint, dusty undersides, and humid spots. This usually happens at the worst moment.
Test one clip first. Use screw mounts or a different path if the surface won’t hold.
| Mistake | What happens | Quick fix |
|---|---|---|
| Over-tight zip ties | Damaged wires and flaky connections | Use reusable ties; leave slack |
| Buried power bricks | Heat buildup and shorter life | Move to ventilated tray |
| Mixed bundles | Signal interference and flicker | Separate power and data runs |
| No labels | Slow upgrades and extra work | Label both ends |
| Weak adhesive | Clips fall at inconvenient times | Test surface; use mounts |
Practical fix mindset: you don’t need to start over. Loosen tight ties, add airflow, and re-route a few lines at a time. Aim for safe, stable, and maintainable over perfectly hidden.
For common mistakes and practical repairs see a more detailed list at common mistakes guide and renter-friendly solutions at best home finds for renters.
Keep it cable-free long-term: maintenance and easy upgrades
A small monthly habit keeps your system safe and makes upgrades painless. Regular checks stop small wear from turning into sudden failures. This section shows practical steps you can do in minutes.
Monthly quick checks
Do this each month:
- Wiggle plugs and feel for loose connections.
- Touch adapters for warmth; warm means check ventilation.
- Inspect jackets for nicks or rubbing at edges.
- Look for sagging runs and re-secure clips or ties.

Design access points for easy upgrades
Leave small service loops and one reachable hub so you can add devices without full teardown. Label both ends so you swap a line in seconds. Plan access spots near outlets and behind furniture.
When to replace and why maintenance matters
Replacement rule: if a cord is frayed, a connector wiggles, or a strip feels unreliable, replace it now. Don’t gamble on intermittent faults.
Good management saves you time and energy. A tidy layout makes it easy to switch off groups of devices and cut standby draw.
„Five minutes a month prevents an hour of trouble later.“
| Check | Action | Why |
|---|---|---|
| Loose plug | Tighten or replace | Prevents sparks and loss |
| Warm adapter | Move to ventilated spot | Extends life and safety |
| Frayed cable | Replace immediately | Avoids short and damage |
For deeper how-to tips, see a practical cable management guide, or compare budget vs premium choices before you buy replacements.
Conclusion
Finish one zone well and the rest of the room becomes easy to maintain.
Start small: pick a desk, TV wall, or kitchen counter. Map devices, plan routes, and choose one central hub. This approach saves time and prevents rework.
Practical rules: separate power and data runs, leave a service loop for movement, ventilate power bricks, and label both ends. These steps improve safety, reduce heat, and make troubleshooting fast.
Renters: use raceways, clips, and furniture paths for a neat result without drilling. Budget tools handle light needs; ventilated trays and sturdier mounts pay off for many devices.
Maintain it: do a five‑minute monthly check for warm adapters, loose plugs, and frayed jackets. For a useful docking reference, see this docking station guide.