Promise: You’ll get a renter-friendly, no-drill reset that focuses on the highest-impact changes. This is a practical 30-minute plan meant for real life, not perfection.
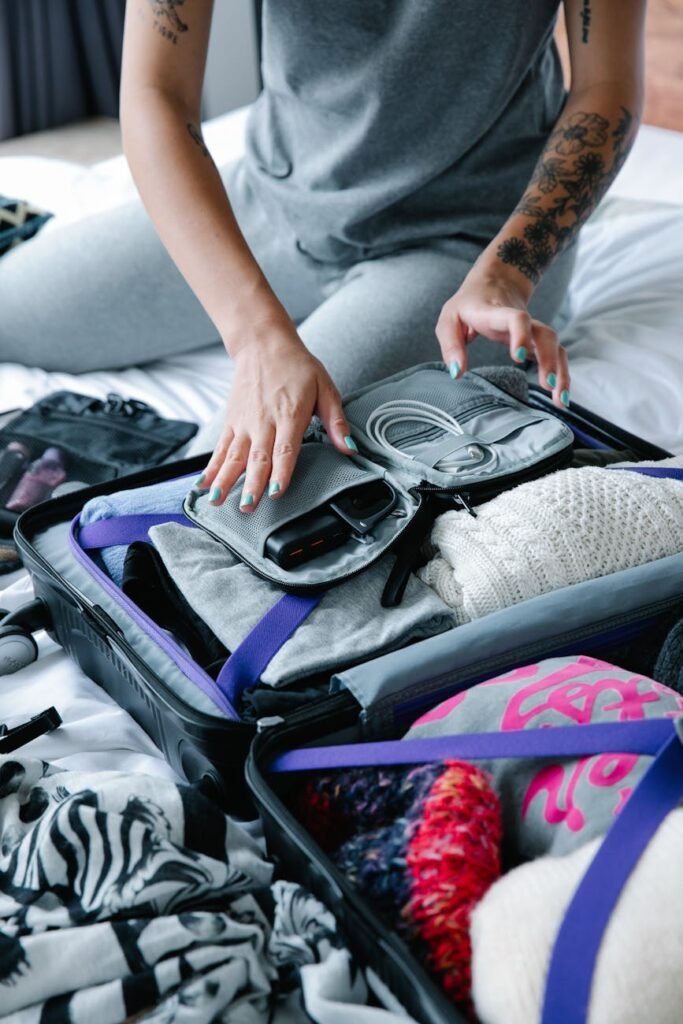
Quick goal: Fewer steps, less searching, and fewer piles on the counter during daily use. Experts suggest thinking in zones and using four simple bins: Keep, Recycle, Donate, Return.
Use reach-and-frequency placement. Put items where you grab them most. Pair containers with labels for instant pantry clarity.
We’ll show safe ways to park unfinished tasks if refrigerated food or deep decanting threatens the time limit. You’ll also see renter-friendly tools like over-door racks, removable hooks, turntables, and vertical organizers that avoid drilling.
This plan includes budget picks under $25 and upgrades under $50 that are worth it in small-space living. The payoff is a kitchen that supports cooking, cleaning, coffee, and quick meals without constant re-organization.
Key Takeaways
- A short, 30-minute reset focuses on high-impact moves.
- Work in zones and use four simple bins for decisions.
- Choose renter-friendly, no-drill tools and budget options.
- Park bigger tasks safely so you finish within time.
- Labels and containers make daily maintenance realistic.
Set a 30-minute kitchen reset plan that actually works
Pick one small hotspot that bugs you most and focus there for a clear win. This makes the session feel successful even when the whole room stays as-is.

Choose your most annoying problem area first
Pick the drawer, mug pile, or under-sink mess that blocks daily use. Aim for a visible payoff. A quick win builds momentum for the next session.
Think in zones to save steps
Group items by function: cooking near the stove, unloading by the dishwasher, prep at the main counter, and cleaning supplies under the sink. This cuts steps for real people and prevents traffic jams during meals.
What if you can’t finish in one session
Set a 30-minute timer: 5 minutes setup, 15 minutes sort/declutter, 10 minutes reset and put-back. Keep one clear counter for daily use. Use a labeled „Return to Proper Spot“ bin and close cabinets so the place stays usable.
| Mini Block | Action | Result |
|---|---|---|
| 5 min | Gather bins, clear workspace | Less drift, faster decisions |
| 15 min | Sort quick: Keep / Donate / Recycle / Return | Visible progress |
| 10 min | Put back daily items, label bin | Kitchen ready for use |
| Safety | Keep cleaners together, off open shelves | Reduced risk for kids and pets |
Need more guidance? Check this kitchen problem mix for common hotspots and renter-friendly fixes.
Quick prep before you touch a cabinet
Open a clean workspace on the main counter before you touch any cabinets. This keeps crumbs and piles from migrating and makes decisions simpler.

Protect surfaces so you can move without making a bigger mess
Clear one “landing strip” on the counter as your staging area. Place a towel, baking sheet, or washable mat there to catch spills and crumbs.
Pros: mats are washable and quick. Towels are cheap and replaceable. A baking sheet gives a rigid work surface.
Grab four sorting bins for faster decisions
Use four labeled containers: Keep, Donate, Recycle, and Return to Proper Spot. This removes micro-decisions and keeps momentum.
Renter-friendly options work well. Cardboard boxes, laundry baskets, or sturdy plastic bins hold weight and stack. Avoid dumping things on the floor — that slows you down and blocks movement.
- Rule for random things: anything not a kitchen item goes straight into Return to Proper Spot.
- Set the trash can nearby and leave walkways clear for safety.
- Drawer and shelves work is faster when bins are staged first; you won’t re-handle the same items.
Empty kitchen cabinets, shelves, and drawers for a true fresh start
Clear everything from a single cabinet and treat that space as a blank slate. Working one cabinet at a time prevents a chaotic pile-up across the room. It keeps walkways open and the session realistic for a small apartment.
Staging without extra furniture
Use the cleared counter as your main staging zone. Add the kitchen table if you need more space. Reserve one small floor corner only when necessary.
Stage by category
Group mugs with mugs, pans with pans, and food storage with food storage. That makes duplicates obvious and speeds decisions. Keep heavy items low and fragile items on a flat, stable surface.

What to skip today
Skip the fridge and freezer unless that is your chosen zone. Cold food slows you down and can derail the 30-minute goal. Also leave bulk backstock, papers, and sentimental items for a later deep session.
- One-cabinet rule: Empty, sort, and return before moving on.
- Safe stacking: Don’t pile breakables on chairs; stack heavy items on the floor or low shelf.
- Daily use win: Once items are visible, place frequent-use pieces within reach where you actually cook and clean.
Small, consistent wins matter. If you want extra tools, check these best organization picks for renter-friendly, durable options.
Sort “likes with likes” to find duplicates and wasted space
Group like items so you can see duplicates and clear wasted space quickly.
This means putting similar things together before you decide. When dishes, cups, utensils, pans, and small appliances sit side-by-side, choices get simple.
Fast categories that work in most homes
Default list: dishes, cups, utensils, cooking tools, pans, small appliances, food containers, towels.
Grouping reveals sneaky clutter. Five mismatched lids, three near-identical spatulas, or two travel mugs that never leave a shelf become obvious. Keep the best one and set extras for donate or storage.
How to handle random items that don’t belong
Drop non-kitchen things straight into your Return to Proper Spot bin. This stops odd items from living in prime cabinet space.
„Sort like with like; you’ll cut duplicates and free real shelf room.“
Shared-home tip: make community categories (shared pans, shared dishes) and personal zones (your mug). That reduces daily friction and confusion.

| Category | Quick check | Decision | Where it goes |
|---|---|---|---|
| Dishes | Count sets, check chips | Keep core set, donate extras | Everyday shelf |
| Utensils | Compare function | Keep weekly-use, store rest | Top drawer / high shelf |
| Small appliances | Use frequency | Keep weekly-use, box seasonal | Counter or closet |
| Random items | Non-kitchen | Return immediately | Return to Proper Spot bin |
Want renter-friendly product ideas that match these categories? Check the best small kitchen solutions for compact, budget picks.
Declutter quickly without regret
Clear a small pile and use a single decision rule that ends second-guessing.

Keep rules: Keep what you use weekly, what replaces takeout, and what fits safely in your storage. If an item adds real daily value, it earns a spot.
Keep, donate, recycle, toss: the fastest decision rules
Quick checklist:
- Keep: weekly-use tools and items that save time or money.
- Donate: duplicates when you have a clear favorite.
- Recycle/toss: cracked food containers, chipped dishes, and frayed cords — safety matters.
Duplicates, broken items, and missing parts
One-lid-less containers and orphaned blender pieces waste space and slow you down. Toss or recycle broken parts and keep only complete sets that stack well.
Small appliances you rarely use and what to do instead
Specialty appliances like bread makers or waffle irons are nice, not necessary. In small apartments, borrow, share, or pick one multi-use appliance rather than three single-use gadgets.
„Counter and cabinet space are often more valuable than a novelty appliance you touch twice a year.“
| Decision | Quick rule | Where it goes |
|---|---|---|
| Keep | Weekly use or replaces takeout | Everyday shelf |
| Donate | Clear favorite already chosen | Donation box |
| Recycle/Toss | Cracked, chipped, or unsafe | Recycling or trash |
| Pause (no regret) | Unsure — date the box | Revisit quarterly |
Safety note: damaged supplies and broken cords are hazards. Let them go so the space stays useful and safe.
Wipe down cabinets and drawers for a cleaner reset
A quick wipe of empty shelves makes the whole space feel ready for use. Empty one cabinet or drawer, then follow a short, repeatable routine. This keeps the session practical and renter-friendly.
Three-minute method per zone:
- Dry swipe crumbs first.
- Damp wipe sticky spots next.
- Dry again so items won’t stick to moisture.
This small cleaning matters. Clean shelf surfaces stop crumbs from moving into dishes. They also keep pantry containers from feeling grimy. That makes daily storage easier and less stressful.
Linings and nonskid pads:
Thicker shelf liners protect wood and make future wipe-downs simpler. Thin liners can bunch and curl, adding work. For a renter-friendly compromise, use small nonskid pads where sliding is real, like under cutting boards or stacked plates.
„A quick clean and a few pads cut breakage and make shelves behave.“
| Option | Pros | Cons | Best use |
|---|---|---|---|
| Thick shelf liner | Durable, fewer replacements | Requires measuring, trims | High-traffic shelves |
| Thin liner | Cheap, easy to buy | Curls, bunches over time | Short-term protection |
| Nonskid pads | Simple, local grip | Limited coverage | Stacks, turntables |
| No liner | No installation needed | Surfaces need regular wipe | Quick resets |

Quick safety note: avoid strong scented cleaners inside food cabinets unless they are fully dry and aired. Good enough cleaning removes crumbs and spills and lets you put items back without residue.
Put everyday items back first using a “reach and frequency” rule
Put the things you use every day within arm’s reach so putting them away feels natural. The basic rule is simple: the more you use an item, the closer it should live to where you use it.
Arms-reach shelves are for daily plates, bowls, mugs, and main cooking tools. Keep these on easy-open drawers or the top accessible shelf so you never need a step stool. Hagmeyer recommends placing everyday dishes and glasses near the dishwasher. That speeds unloading and cuts the stack-on-counter problem.
High shelves are for seasonal platters, holiday bakeware, and rarely used appliances. If you lack extra storage like a garage or closet, put seasonal things in labeled bins on the highest shelf so they stay contained and tidy.
Quick reset test: If tucking an item away takes more than one awkward move, it will likely return to the counter. Move that item into a more reachable spot.
Safety note: Don’t store heavy glass sets above head height if you handle them often. Match weight and durability to the shelf you pick.

| Rule | Example | Where it goes | Benefit |
|---|---|---|---|
| Frequent use | Dishes, mugs | Arm’s-reach shelf | Faster unloading |
| Weekly use | Main pots, spatulas | Top drawer / lower shelf | Easy grab during cooking |
| Rare use | Seasonal bakeware | High shelf / labeled bin | Keeps space clear |
| No room elsewhere | Backup appliances | Stacked, labeled bins | Contained, renter-friendly |
For small-space tips and product picks that support this rule, see kitchen essentials mix.
Zone setup that prevents clutter from coming back
Designing clear zones gives every item a sensible home near where you use it. That makes putting things away easier than leaving them out. Zones also cut steps and daily friction in small apartments and shared spaces.

Dishwashing and unloading area near the dishwasher
Keep plates, bowls, glasses, and cutlery on the shelf closest to the dishwasher. Unload straight into place and avoid counter piles.
Cooking area by the stove
Store pots, pans, and everyday utensils beside the range. Put lids and spatulas within one reach so you don’t cross the room while cooking.
Food prep counter
Keep cutting boards, knives, mixing bowls, and small prep tools near your main work surface. A narrow tray or magnetic strip keeps knives accessible and safe.
Coffee station
Group mugs, beans, filters, and a spoon or scoop on a single tray or small shelf. A dedicated station prevents morning items from spreading across cabinets.
Dining and serving area
Store serving dishes, extra glasses, and cutlery together near the table. This makes setting the table quick when guests arrive.
Cleaning supplies under the sink
Keep cleaning supplies upright in a shallow bin. Use a leak-friendly tray and child-safe locks if needed. Label bottles and place dish towels nearby for fast use.
Shared-kitchen tip: Label shelves or drawers by zone so roommates can return items correctly without asking. Simple labels cut confusion and keep shared space functional.
| Zone | Key items | Renter-friendly layout |
|---|---|---|
| Dishwashing | Plates, bowls, cutlery | Shelf beside dishwasher; shallow baskets for cutlery |
| Cooking | Pots, pans, utensils | Lower cabinet near stove; lid organizer on door |
| Prep | Cutting boards, knives, tools | Counter hook for boards; magnetic knife strip |
| Coffee | Mugs, beans, filters, scoop | Small tray on counter or a single shelf |
| Cleaning | Cleaners, sponges, towels | Bin under sink with leak tray and safety lock |
How to organize kitchen fast with renter-friendly, no-drill organizers
A few renter-friendly pieces turn forgotten cabinet faces into usable storage in minutes. Keep the plan simple: no drilling, removable hardware, and setups that peel off cleanly when you move.

What makes an organizer renter-friendly
Renter-friendly means no permanent holes, easy removal, and minimal residue. Look for adhesive strips rated for your surface and over-door racks that hook on thin cabinet faces.
Over-cabinet and over-door racks
Pros: instant extra storage and better vertical use of dead space. Cons: can block door closure if too thick. Best for studios and one-bedrooms where door-mounted racks reclaim lost wall space.
Adhesive hooks and removable strips
Use these for towels, utensils, and small tools. They work well in tiny kitchens with limited drawer room. Durability varies by surface—clean and dry the cabinet before sticking.
Safety note: respect weight limits. Don’t hang heavy pans or glass. Test one hook before adding multiples.
Turntables and vertical organizers
Turntables tame deep shelves and keep spices, oils, and condiments visible. Vertical dividers stop the avalanche of cutting boards, trays, and pans.
Best for deep or cluttered cabinet areas where items get lost at the back.
| Product | Pros | Cons | Best for |
|---|---|---|---|
| Over-door rack | Instant vertical storage, no tools | May block door if thick | Small kitchens, studios |
| Adhesive hooks | Cheap, flexible placement | Adhesive varies by surface | Towels, light tools |
| Turntable | Makes deep shelves accessible | Needs shelf space and clearance | Deep cabinets for spices |
| Vertical organizer | Stops sliding trays and boards | May limit wide items | Cabinets holding cutting boards and bakeware |
Alternatives by apartment size: studios gain most from door-mounted pieces. One-bedrooms can add wall-mounted strips and slim racks. Shared kitchens benefit from labeled zone bins and a few sturdy organizers per shared area.
Value note: you’re buying fewer daily headaches and more usable space, not perfect styling. Pick durable, removable options and test weight limits for safe, renter-friendly results.
Budget-friendly organizing products under $25
Small purchases can make a big daily difference. Pick items that solve a single pain point each week: stop drawer chaos, make pantry items visible, and keep shelves from sliding into a pile.

Drawer organizers for utensils and tools
Why buy: compartments create boundaries so forks, spatulas, and tools stay put.
- Pros: prevents shifting, speeds finding items, cheap.
- Cons: measure drawer width first or pieces won’t fit.
- Who it’s for: anyone with an overstuffed top drawer or mixed utensils.
- Durability: choose thicker plastic with smooth edges.
- Renter-friendly setup: no adhesives; just place in the drawer.
Clear bins for pantry items, snacks, and pouches
Why buy: grouped containers make quick visual scans possible.
- Pros: great for kids and busy mornings, stackable, visible contents.
- Cons: clear plastic shows clutter if overfilled.
- Who it’s for: snack-heavy households, small pantries, grab-and-go mornings.
- Durability: pick rigid plastic with tight seams.
- Renter-friendly setup: place on a shelf or in a cupboard without mounting.
Labels that help roommates and family return items
Why buy: labels cut guessing and keep shared spaces consistent.
- Options: label maker, masking tape with marker, chalk labels.
- Benefit: fewer “where does this go?” moments.
- Renter note: stick labels on bins, not cabinets, or use removable adhesive.
Nonskid pads and shelf grippers to prevent sliding and breakage
Why buy: pads reduce noise, keep stacks steady, and protect plates.
- Pros: reduces breakage, inexpensive, easy install.
- Cons: thin pads can curl or trap crumbs; buy thicker, easy-clean types.
- Who it’s for: anyone with sliding stacks or turntables on deep shelves.
- Renter-friendly setup: choose pads that lift cleanly and don’t leave residue.
Durability checklist: aim for thicker plastic, smooth edges, and wipeable surfaces so these buys don’t become extra chores.
Final tip: if an item won’t save you time or space weekly, skip it. Small, practical buys under $25 are worth it when they reduce daily friction and keep items in their place.
Upgrades under $50 that make small kitchens feel bigger
A single, well-chosen item can free counter space and calm a busy pantry. Pick upgrades only when they solve a clear pain: too little counter area, wasted shelf height, or chaotic food staples.

Stackable airtight containers for pantry staples
Pros: stacking saves space, keeps food fresh, and cuts visual clutter.
Cons: upfront cost and the need to measure shelves first.
Best for: small pantries and open shelves that look messy.
Practical tip: measure shelf height and depth so lids clear and stacks fit before you buy.
Rolling cart as extra counter and appliance parking
Pros: adds mobile counter space and a parking spot for small appliances.
Cons: needs a defined parking place or it becomes extra clutter.
Best for: studios and galley layouts that need flexible work surface.
Tiered racks for wasted vertical shelf space
Pros: improves visibility for cans, mugs, and spices.
Cons: poor sizing can reduce overall capacity.
Durability note: pick stable racks with nonslip feet and avoid top-heavy carts if you have kids or pets.
| Upgrade | Pros | Cons | Best-for |
|---|---|---|---|
| Stackable airtight containers | Space-saving, fresh staples | Measure shelves; initial cost | Pantry staples like flour, sugar, rice |
| Rolling cart | Extra counter, appliance parking | Needs spot or adds clutter | Studios, galley kitchens |
| Tiered rack | Better visibility on shelves | Can reduce capacity if wrong size | Cans, spices, mugs on deep shelves |
Alternatives: if a cart won’t fit, try a slim shelf riser or an over-door rack. If containers feel pricey, start with three staples and expand later. The goal is real, usable space — not more stuff.
Pantry, food storage, and containers that reduce visual clutter
A tidy pantry starts with clear goals: less visual noise and fewer duplicate buys. The point is simple. You want to find food fast and stop rebuying things you already have.

Clear vs opaque containers: what’s easier in real life
Clear containers show contents at a glance. They cut search time and lower waste because you see levels quickly.
Opaque containers look calm and protect light-sensitive items like oils. Use strong labels if you pick opaque.
Quick measuring method before buying
- Measure shelf height, depth, and usable width between supports.
- Note clearances for lids and stacked sets.
- Buy containers that match those numbers, not trends.
Where bags, boxes, and backups should live
Keep one active bag or box in the main pantry zone. Move backups into a labeled backstock bin on a high shelf or under the sink.
Bag control: one bin for snack pouches, one for baking items. Lift-out bins make cleaning and moving simple if you change apartments.
„Match containers to actual staples and edit quarterly; this makes weekly mini-resets quick and painless.“
| Item | Place | Benefit |
|---|---|---|
| Daily staples (rice, pasta, cereal) | Main pantry shelf in clear containers | Easy scan, prevents duplicates |
| Snack bags/pouches | Designated lift-out bin | Stops spread and collapse |
| Backups | Labeled backstock box | Keeps prime space clear |
Drawer and cabinet layouts for utensils, dishes, and awkward items
Tackle one drawer at a time so each step feels manageable and stays contained. That prevents a bigger mess and keeps progress real in small space.

Silverware and flatware compartments that don’t shift
Use a rigid compartmental organizer for forks, spoons, and small tools. Add a nonskid pad under the tray if it slides.
Pros: clean separation, quick finds. Cons: measure drawer width first.
Knife storage that clears the counter and improves safety
In-drawer knife blocks or foam trays keep blades covered and counters clear. They are renter-friendly and safer than loose knives in a drawer.
Best for: households wanting safer counters. Trade-off: uses some drawer depth.
Deep drawer strategies for pots, lids, and containers
Group pots and pans together and nest lighter pots inside heavier ones. Store lids vertically in a simple divider so they don’t tangle.
Use bins for food containers. Keep only shapes that stack well and fit drawer depth.
Where dish towels go so they’re actually used and put away
Assign one nearby drawer or a small hook by the sink for towels. When towels live close, you use them and put them back.
Keep heavy items low, sharp items secured, and nothing stored where it can fall when you open a cabinet.
| Item | Layout tip | Best-for |
|---|---|---|
| Silverware | Compartment tray + nonskid pad | Top drawer users |
| Knives | In-drawer block or foam tray | Safety-first households |
| Pots & lids | Nested pots; vertical lid rack | Deep drawers near range |
| Containers | Grouped by stackable shapes | Pantry and drawer storage |
| Towels | Nearby drawer or hook by sink | Daily-use convenience |
Small-apartment alternatives based on your kitchen size
In tight apartments, every inch must earn its keep.

Studio and galley kitchens with minimal counter space
Prioritize clearing the main surface. Keep only daily items in the most reachable cabinets and stash extras in a slim rolling cart that can park out of the way.
Pros: protects prep area and adds mobile storage. Cons: carts need a parking spot or they become clutter.
One-bedroom kitchens with extra wall space
Use open shelving or over-door racks that look like wall mounts but require no drilling. This expands visible storage and makes small rooms feel airier.
Pros: light, accessible. Cons: shows clutter; needs regular tidying. Worth it: open shelves plus labeled bins for neatness.
Shared kitchens and mixed systems for roommates
Agree on simple zones, add clear bins, and label shelves so multiple people return items correctly. Labels beat complicated gadgets in shared spaces.
Pros: simple rules that people follow. Cons: everyone must commit for the system to work.
The best system is the one that survives real weekdays with real people in the room.
Safety, durability, and easy setup checks
A quick safety checklist prevents small upgrades from creating big hazards. Read labels, test attachments, and keep common-sense rules nearby so your updates stay renter-friendly and reliable.

Why storing items in the oven is risky
Leaving pans or boxes in the oven invites trouble. It’s easy to forget an item when you preheat. That can melt plastic, make smoke, or start a fire.
Practical alternative: designate a low cabinet or a high shelf for bulky pans so the oven stays clear and ready for use.
Fire extinguisher placement and kitchen-ready essentials
Keep a multipurpose extinguisher within easy reach and another near an exit. Read the instructions now and note the test schedule. Put first-aid basics, a flashlight, and a clear path to exits on your quick checklist.
Weight limits, adhesives, and what not to hang
Always follow weight limits for any adhesive strip or rack. Clean the surface before applying. Avoid hanging heavy pots, large glassware, or anything that could injure someone if it falls.
Durability check: pick thicker metal, reinforced corners, and non-slip feet so shelves and racks do not bend or wobble.
Renter-friendly setups protect your deposit and protect the people in your home.
Daily routines and easy maintenance that keep it organized
A few brief rituals each day protect your counters and your time. These small steps stop mess from growing and make weekly upkeep realistic.
The nightly five-minute tidy: set a timer, clear the table, run the dishwasher if it’s full, and wipe the sink and counters. Return condiments and stray cups to their home so morning prep is faster.
The weekly mini-reset for pantry and fridge-adjacent areas
Once a week, scan the pantry for expired items and consolidate open bags into labeled containers. Move loose things back into bins so one shelf doesn’t spill into another.
Quarterly edits that stop excess containers, cups, and bags
Every three months, pare down extra containers and travel cups. Cap and fold shopping bags into a single bin. If an item has no clear home, it becomes a candidate for donate or box for review.
Simple habit tie-ins for entryways, closets, and bathrooms
Create an entryways drop spot for mail and keys, keep a closet bin for bulk supplies, and a small bathroom backup shelf for toiletries. These spillover systems keep non-kitchen things from migrating into cabinets.
„Labels and one-minute resets are easier for households than complicated rules.“
| Routine | What you do | Benefit |
|---|---|---|
| Nightly (5 minutes) | Timer, load dishwasher, wipe surfaces, return cups | Prevents weekend cleanup |
| Weekly | Toss expired, consolidate open bags, re-bin pantry items | Keeps pantry usable and visible |
| Quarterly | Edit containers, reduce extra cups and bags | Stops storage creep |

Conclusion
Close the session with a short routine that preserves your gains.
Plan a 30-minute reset: pull a zone, sort with four bins, group like items, declutter broken pieces, wipe surfaces, then put everyday things back by reach and frequency.
Keep it renter-friendly: pick removable solutions, avoid drilling, and favor durable pieces that hold up in small space living.
Start with budget basics under $25 — drawer trays, clear bins, labels, nonskid pads — and upgrade under $50 only when it truly frees storage or space.
Safety note: leave the oven empty, respect adhesive weight limits, and keep a fire extinguisher near an exit.
Adopt the nightly five-minute tidy, a weekly mini-reset, and quarterly edits. Choose one problem zone now, set the timer, and let done beat perfect.