You want home tech that works in real life, not a weekend project that eats your day.
This short guide shows quick, renter-friendly installs that are practical and low fuss.
You’ll get a working setup fast in a small space without drilling or complex wiring.
Expect a functional, tested result — not hidden cables or full customization.
This piece covers quick prep, where the time really goes, and three clear examples: a smart camera, beginner vinyl, and budget streaming.
You’ll learn honest tradeoffs like Wi‑Fi needs, app ties, and optional subscriptions.
Key Takeaways
- Real results fast: aim for a functional system you can use today.
- Renter-friendly: shelf placement, low noise, and minimal clutter.
- Simple checks prevent redoing work and save time later.
- Expect tradeoffs: speed often relies on apps and Wi‑Fi.
- See practical picks and budget finds, like these budget picks, to speed setup and daily use.
What “setup under 10 minutes” really means for home tech today
A true quick install delivers usable gear the same day, not just an emptied box. Aim for a basic working state you can rely on. That means power, app sign-in, and a tested placement.

Fast to unbox is not the same as fast to finish. Wyze cites a about seven minutes from box to protection in ideal cases. In practice, most delays come from Wi‑Fi passwords, account steps, and figuring out where a device actually works in a small apartment.
What works best in small spaces
- Plug-in and shelf-ready: no drilling, movable, renter-friendly.
- Low-noise and low-heat: check specs or reviews for real-life use.
- Minimal extras: avoid devices that need multiple hubs or extra wiring.
| Type | Pros | Cons |
|---|---|---|
| Plug-in camera | Fast connect, portable | Depends on Wi‑Fi, can need subscription |
| All-in-one speaker | Simple audio, small footprint | Limited upgrade path |
| Streaming stick | Quick to start, low space | Remote learning curve for some apps |
Practical tip: screen gadgets by noise level, heat output, and whether they can share a shelf. If you want a quick renter-friendly plan, see this renter comparison for clear choices.
Before you start: quick prep to avoid redoing everything
A little prep saves a lot of redo work when you’re putting gear in a small apartment. Spend a short moment to confirm basics so the full setup goes smoothly.

Space requirements: shelf depth, door clearance, and cable paths
Measure the shelf depth you actually have. Check if doors or cabinets can bump the device. Plan cable runs so cords don’t cross walkways.
If your lease bans drilling, favor magnetic bases, adhesive mounts, or simple shelf placement. These renter-friendly options keep your walls intact and let you move gear later.
Power and safety: outlets, surge protection, and heat
Use a surge protector for sensitive electronics and avoid overloading one outlet. Leave a little clearance around devices that run warm.
Remember power consumption. Small gadgets running 24/7 add up. Note whether a device is always-on or only powers when you use it.
Wi‑Fi basics without jargon: quick phone checks
On your phone, confirm you’re on the correct network name and the password is saved. Check the signal where the device will sit so the camera or streaming gear can actually work.
- Pick a spot.
- Confirm power.
- Confirm Wi‑Fi.
- Then open the app.
Bring one simple tool like a cable tie or cutter to bundle cords. This saves time and prevents a spaghetti mess.
„Internet stability is the glue for cameras and streaming — check upload speed if you plan to broadcast.“
Make sure you have extra outlet access or a longer cable before you set everything up. Fix those small things now so you don’t redo the whole setup later.
Real benefits you can expect in a small apartment
Quick, renter‑friendly gear won’t turn your place into a full smart home. It will, however, make daily life smoother in easy, practical ways.

Energy savings from smarter habits (not magic)
You’ll save more by changing habits than by buying a gadget that promises instant payback. Use timers, power strips, and schedules to cut phantom draw.
Practical wins: schedule lights for when you’re out, turn off chargers automatically, and set sleep modes for speakers. These act together to reduce bills without extra effort.
Safety and peace of mind without drilling or wiring
App‑based cameras and motion alerts give real awareness. You can check a live feed, get a motion notice, or confirm a doorstep delivery from your phone.
Renter-friendly: most devices sit on a shelf or plug into an outlet. No holes, no long cables, and minimal commitment.
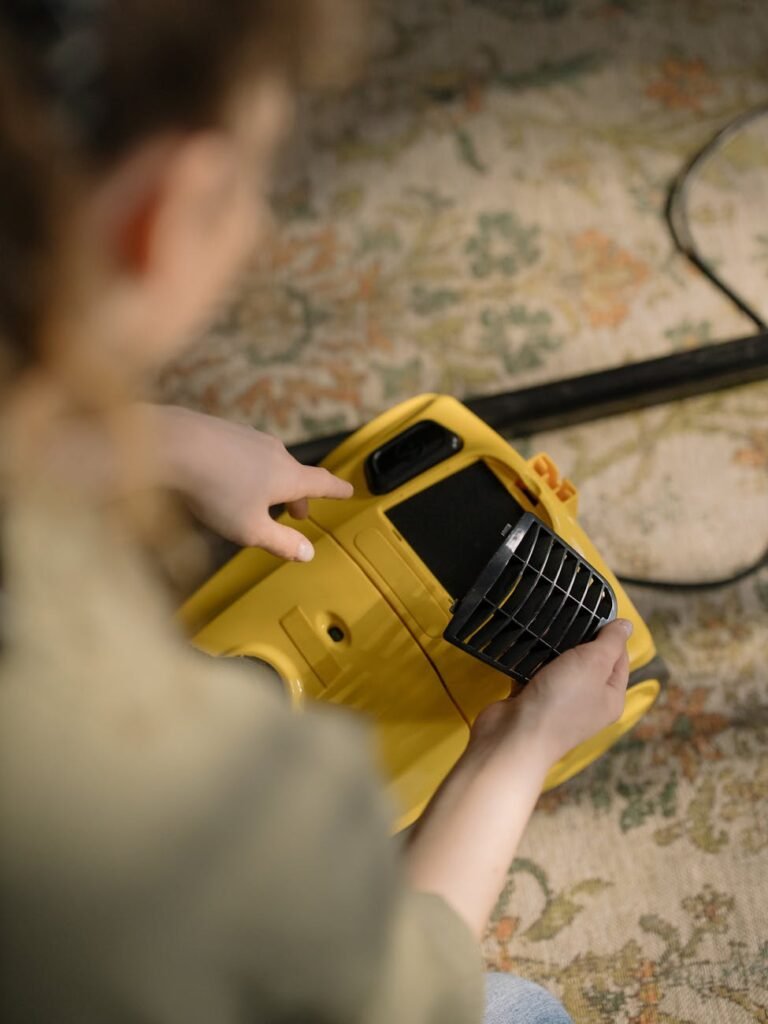
Less daily friction: cleaning, kitchen tasks, and simple automation
Small systems that do one job well help you every day. Try a scheduled light for evening prep, a kitchen timer you actually see, or a compact robotic vacuum that runs on a set routine.
Keep settings simple. When a device is fast to install and easy to use, you’ll keep it running and it will keep saving you time.
- Realistic scope: not a full smart apartment, but useful tools that work in real life.
- Noise matters: pick low‑noise gear for thin walls.
- Stick with one clear job per device: simpler systems are more likely to work long term.
Who needs this quick setup approach and who doesn’t
Deciding if quick gear fits your life starts with how often you move and how much fuss you tolerate.
If you are one of the people who rent, travel, or juggle work and family, this style is a practical match. It saves time and avoids wall repairs. First-time buyers also benefit. Fewer parts and fewer compatibility surprises reduce setup headaches.

Honest pros and cons
Pros: fast to place, renter-friendly, low commitment. These wins matter in small spaces.
Cons: budget devices may skip premium features like top-tier motion detection or local storage. Some features require a subscription. Wyze-style plans can cost as little as about $2.99/month for single-camera options and roughly $9.99/month for multi-camera plans. Keep that in mind when you compare costs.
Practical options and when to call a pro
- If you dislike apps or cloud accounts, choose offline or local-first devices as an alternative.
- Pick quiet models if shared walls or sleeping areas matter; fan and motor noise vary a lot by model.
- Hire a technician if you need hardwired power, ceiling mounts, or network rewiring to meet building rules.
| Audience | Why it fits | When to avoid |
|---|---|---|
| Renters | Portable, no drilling, fast | When you need silent operation or enterprise features |
| Busy people | Saves time, simple controls | When you require advanced customization |
| First-time buyers | Fewer parts, easier learning | When you want premium longevity and upgrades |
„Pick the option that solves the problem you have today, not the one that promises every feature tomorrow.“
Setup time: a realistic breakdown to get running in under 10 minutes
Knowing where the clock goes helps you finish fast and avoid follow-up fixes. This short plan shows typical time slices and the simple checks to finish with a working system.

Unbox and plug in
Unbox and plug: power cable in, adapter kept, and the quick‑start card saved. Toss excess ties and plastic after the device powers on.
App setup in minutes
Download the official app, sign in once, and allow only the permissions needed for core functions. Scan the QR or follow the in‑app prompt. This step usually takes about two minutes.
Wi‑Fi: quick path vs troubleshooting
Quick path: stay near the router, use the saved password on your phone, and wait for a full connection before moving the device.
Troubleshoot: confirm you are on the right network, retype the password, and check frequency support if pairing fails.
Placement and final check
Pick one clear view and avoid clutter. Do a live feed, sound check, and test one simple control like mute or record.
| Step | Estimated time | What to keep |
|---|---|---|
| Unbox & power | ~1 minute | Adapter, mount, quick card |
| App & sign in | ~2 minutes | Login info, app permissions |
| Pair Wi‑Fi | ~2 minutes | Phone with saved password |
| Place & test | ~2 minutes | Live view, quick control check |
- Make sure power is stable.
- Make sure the device shows a live feed before you mount.
- Done list: powered, connected, placed, and you can control basic functions without hunting menus.
„A short checklist keeps momentum and avoids repeated work.“
Example: easy smart security camera setup under 10 minutes (Wyze-style)
You can get a working camera watching your entry without fuss or holes. Follow a tight flow: plug in, open the app, scan the QR, join Wi‑Fi, and place the camera on a shelf near the door. This package turns an empty box into a useful system for deliveries and hallway checks.

Box to protection: the realistic flow
Step-by-step:
- Plug in (~60s).
- Install the app and sign in (~2 minutes).
- Scan the QR (~30s) and connect Wi‑Fi (~2 minutes).
- Place and test live view (~2 minutes).
Honest pros and cons
Pros: affordability helps you cover multiple angles without a big spend. A low-cost package often integrates with Amazon Alexa and Google Assistant and supports two-way audio.
Cons: the system depends on Wi‑Fi. If your network drops, the camera can miss events or delay alerts. Many useful cloud features require a monthly plan (basic plans start near $2.99/month per camera; broader plans around $9.99/month).
Noise, privacy, and simple maintenance
Noise: lower notification frequency and reduced speaker volume keep alerts from being annoying in tight spaces.
Privacy: don’t aim the camera at neighbor doors, shared hallways, or private areas. Respect roommates and building rules when choosing angles.
Care: wipe the lens occasionally, check settings after app updates, and confirm motion zones so the camera keeps doing the work you want.
„Pick placement and signal strength first — good Wi‑Fi is the glue that makes the whole system reliable.“
For quick budget gear and extras to speed installation, see these compact finds at best budget home gadgets.
Example: vinyl setup that can take less than 10 minutes (beginner-friendly)
Getting good vinyl sound without a lot of gear is practical for small spaces. Choose a simple all-in-one player or a small turntable paired with powered speakers. Either path can get you listening in minutes with the right parts and a clear checklist.

All-in-one player vs separate turntable + powered speakers
All-in-one: compact and fast to use. The Angels Horn H019 (~$240) bundles a turntable and speakers. It saves space and hassle. You trade upgrade options and may accept modest built-in speakers.
Separate components: the U‑Turn Orbit Basic (~$249) plus small powered speakers gives better sound and future upgrades. This route still takes little time to connect if you check compatibility first.
Compatibility made easy
If your turntable lacks a built-in phono preamp, your speakers or amp must have a phono input. Models like the ELAC Debut ConneX DCB41 include a phono input. Other options, for example the Victrola Tempo VPS-400, do not. Confirm this before you buy to avoid very low volume.
Where noise comes from and easy fixes
Vinyl noise usually comes from surface dust, cartridge tracking, speaker placement, and vibration. Use an AudioQuest Anti-Static Record Brush before play to cut surface noise. Place the player on a stable shelf and keep speakers off shared walls where possible.
Maintenance you’ll actually do
Quick routine: brush records before each side. Do a deeper clean with a Spin-Clean Record Washer MKII occasionally. Store records vertically and keep them out of heat to avoid warping over the year.
- Two beginner paths: all-in-one for simplicity, separate components for upgradeability.
- Pro tip: set volume low before the first test track to check preamp needs and avoid surprises.
- Place player on a stable surface.
- Connect outputs and confirm phono preamp requirements.
- Set volume low, then play one record side to test.
Best record player recommendations can help you compare practical options and pick the right type for your space.
Example: a budget-friendly streaming setup that’s fast and apartment-friendly
You want a simple streaming system that sounds clear, looks steady, and won’t fill your room with gear.

The four pillars guide choices: audio, video, software, and internet connection. Prioritize audio first. Viewers forgive average video but not poor sound. A modest mic like the Blue Yeti Nano (~$99.99) or a lapel option such as the DJI Mic 2 gives a big return for the cost.
The minimum upload speeds to check
Match your real upload speed to the stream you want. Aim for:
| Resolution / Frame Rate | Minimum Upload (Mbps) | Who it’s for |
|---|---|---|
| 720p | 4 Mbps | casual streams, talk shows |
| 1080p | 6 Mbps | standard quality, most creators |
| 1080p / 60fps | 10 Mbps | gameplay, fast motion |
| 4K | 25 Mbps | high-end production, rare in small rooms |
Low-space gear that actually works
Use your phone or a small webcam and a compact tripod to hold the shot steady. Add two lights: a key light in front and a soft light or lamp behind you for depth. This keeps the look professional without crowding a desk.
Software options and the learning curve
You can go live fast with platform tools. If you want control, OBS Studio is free and powerful. It has a learning curve, so start with one scene, one mic, and one camera. Grow the system as you learn.
Noise and room choices: place your mic away from windows and thin walls. Soft surfaces like curtains reduce echo. This is the easiest way to make your voice sound clean without heavy editing.
„Start small: one mic, one camera, one scene. Expand only when the basics work well.“
For a clear how-to on streaming gear and workflow, see a practical streamer guide at streamer setup guide.
Budget vs premium options: where to spend and where to save
Deciding where to spend and where to save keeps your small-space tech practical and painless.

Practical rule: spend on things that stop daily frustration. That means audio quality, steady internet, and safe power. Save on bells that only matter in lab tests.
Security cameras: many cheap cameras or one premium model?
Multiple low-cost cameras cover more angles for less money. A higher-end camera brings better low-light, smarter detection, and clearer detail. Remember Wyze plans start ~$2.99/month per camera or about $9.99/month for an unlimited package. Compare that when you plan how many cams you want.
Audio and speakers: where upgrades pay off
Good speakers or a better mic often improve daily sound more than swapping multiple devices. Choose a modest powered speaker or mic first. A small upgrade to the core system will feel worth it long before you chase specs.
Accessories that save time
- Klein Tools 11055 wire stripper-cutter — fast and renter-friendly.
- Monoprice 2747 speaker wire — solid value for powered speakers.
- AudioQuest brush and a Spin-Clean washer to cut record noise and troubleshooting time.
One last way to decide: if you use it weekly, buy better; if it’s occasional, go budget and upgrade when habits prove it’s worth the extra time and money.
Common mistakes that blow past 10 minutes (and how to avoid them)
A few skipped checks can double the time you planned for a simple tech install. Keep a short checklist and you’ll finish faster. Below are the common mistakes that break momentum and easy fixes to keep control of the process.

Starting without checking power, outlets, and cable length
Why it stalls: you plug in, realize the cord is too short, then move the whole device and repeat pairing. That eats time and patience.
Quick fixes: confirm outlet access, avoid daisy-chained extension cords, and carry a spare cable or a surge protector. For common causes of delays that seem minor but add up, see a short guide on typical lockout causes at common issues.
Choosing the wrong spot: blocked views, vibration, and neighbor noise
Blocked camera views, a shaky turntable on a thin shelf, or a streaming shot with noisy neighbors all waste time. Test placement before mounting.
Move gear a foot or two, retry the live view or audio, and pick a stable surface away from shared walls.
Ignoring power consumption and heat in tight spaces
Cramming devices into closed cabinets looks neat but traps heat. Over time this shortens life and can make the system fail when you need it most.
Leave vents clear and check device temps after an hour of use. If a gadget runs hot, give it breathing room.
Overbuying features you won’t use (and underbuying what you will)
People often buy a lot of bells and miss basics like Wi‑Fi range or the right audio inputs. Spend on steady internet and correct cables before chasing extras.
Pick the type of device that fits daily use, not the one with the flashiest spec list. For compact accessory picks, see small-space fixes.
Skipping maintenance until performance drops
Dust on lenses, dirty records, and weak Wi‑Fi slowly make things stop working well. That looks like a failure but is usually a simple fix.
- Wipe lenses and sensors regularly.
- Brush records before play and store them upright.
- Reboot routers and check app permissions after updates.
„Aim for a system you can control daily, not a project you avoid touching.“
Mind this: small checks now save a lot of time later. Make sure you test power, placement, and signals before you finish. You’ll keep things working and avoid repeating steps.
Conclusion
Finish with a practical result: a device that works today and stays useful.
Pick one small problem to solve first — front door awareness, clearer audio, or a vinyl corner — and get that system running. Done means powered, connected, placed safely, and tested. A Wyze-style camera flow often hits about ~7 minutes. An U‑Turn Orbit Basic can be set up in under 10 minutes for listening that works right away.
Keep a short list of non-negotiables: space fit, power safety, acceptable noise, and clear compatibility. Check streaming upload targets (4/6/10/25 Mbps) before you start so quality matches your goals.
Note subscription and privacy tradeoffs for cloud packages and shared spaces. Small maintenance — quick wipes, a record brush or washer, and the occasional Wi‑Fi check — prevents most failures.
For a quick note on crafting a strong conclusion and next steps, see this short guide to structuring conclusions. Start with one device, one room, one routine, and let the system earn its place in your small apartment.