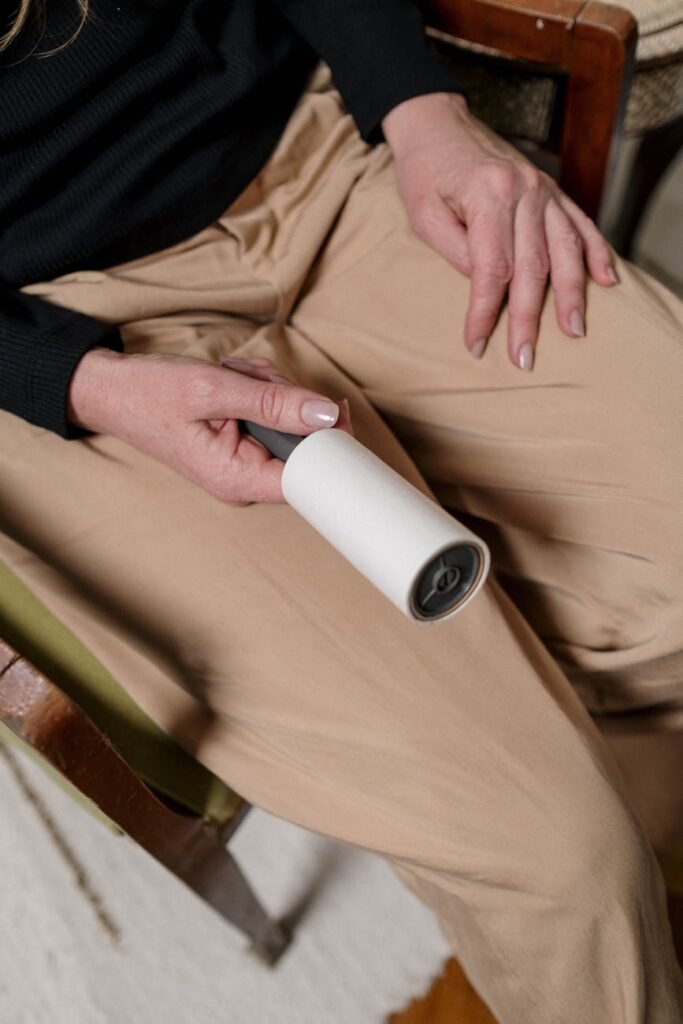
Stop letting daily items take over your bathroom. This short guide shows renter-friendly, no-drill ways to keep essentials accessible without a cluttered vanity.
First, measure width, depth, height, and the drain path so you don’t waste space. Then choose a path: quick wins under $25, smart upgrades under $50, or one simple DIY if you like hands-on fixes.
You’ll learn practical picks with clear pros and cons. I explain what works for a vanity cabinet, a pedestal, or no cabinet at all. Expect removable options you can take with you when you move.
The guide also shows how to reclaim awkward space around plumbing and tight layouts. Tips translate to kitchens, closets, and entryways so the same approach helps other small zones.
Key Takeaways
- Measure first: width, depth, height, and drain path before you buy.
- Focus on no-drill, removable solutions that suit renters.
- Two budget lanes: best picks under $25 and better upgrades under $50.
- Expect pros/cons and “best for” guidance for different bathroom types.
- Apply the same ideas to under-sink kitchen areas, vertical closet zones, and entryway grab spots.
- Simple maintenance habits keep the setup tidy beyond day one.
Why Tiny Sink Areas Get Messy in Small Bathrooms
Small bathrooms get out of hand fast when daily essentials don’t have a clear place. You end up juggling few drawers and a narrow counter. That makes counters the default landing spot for anything you use each day.
Usual clutter culprits include toiletries, hair tools, extra toilet paper, and cleaning supplies that “don’t have a home.” These items pile up because they are used daily or kept as backups.

What lost space looks like
Under the cabinet, plumbing eats real room. The curved drain line and exposed pipes block wide bins. Doors and hinges also create awkward gaps that feel unusable.
Why mess grows fast
- Few drawers and little counter space leave no place to hide backups.
- Door swing and drawer paths reduce usable depth even when the cabinet looks roomy.
- The “pile effect”: uncategorized items stack, tip over, and never get returned.
Daily friction matters. If soap, skincare, and hair items are hard to reach, you will leave them on the counter. The fix is practical: measure first, purge non-essentials, and pick renter-friendly organization that matches your cabinet, drains, and routine. For product ideas that fit common layouts, see the best under-sink solutions.
Measure First: The Tiny Sink Storage Checklist That Prevents Wasted Space
Start by clearing the cabinet and taking precise inside measurements so you buy organizers that actually fit. A quick check saves money and makes the layout practical for daily use.

How to measure inside the cabinet
Empty the cabinet completely. Measure interior width, depth, and height. Note where the drain pipe curves and any shutoff valves. Measure the door opening too so items can move in and out.
Map keep-dry zones and a spill spot
Keep paper goods and backups in higher bins or sealed containers. Define one spill spot under the drain for cleaning liquids only. That prevents a single leak from ruining the rest.
Quick sketch planning and test-fit steps
Sketch a simple plan on paper. Mark plumbing, hinge space, and where a drawer or two can slide. Add ~1/16″ clearance to bin widths, ~1/8″ for lips, and ~3/4″ gaps between bins. Test fit bins before attaching the back panel.
| Measure | Why | Action |
|---|---|---|
| Interior width | Fits bins and drawers | Add 1/16″ clearance |
| Interior depth & height | Avoid blocking plumbing | Mark drain curve on sketch |
| Door opening | Allows access | Measure hinge swing |
| Keep-dry map | Protect backups | Place sensitive items higher |
Real-life reminder: if you try to keep everything under the cabinet you will overflow. Measurement helps you decide what belongs elsewhere and makes the most of limited space.
Set Up Daily Routines That Keep Everything Accessible
Make a small, reachable zone for your everyday items so mornings and nights run faster. Keep this area visible and limited to the 5–10 things you use every day.

Create a morning/night grab area
Pick your core five to ten: soap, cleanser, a toothbrush, a comb for hair, and one or two skincare products. Put them together so you reach them with one hand.
Use a tray to tidy bottles
A single tray makes bottles look intentional. Lift the tray to wipe the counter. Repurposed glassware or small ceramic cups work well for brushes and toothbrushes.
Weekly reset and rotate backups
Once a week, toss expired samples and combine duplicates. Move backups to a labeled bin at the back of the cabinet or to a higher shelf.
- One-minute put-back rule: return items after use.
- Separate daily items from occasional products so counters stop overflowing.
- Keep the daily-use zone visible; hide backups out of sight.
| Routine | Action | Why it works |
|---|---|---|
| Daily grab zone | 5–10 items within reach | Saves time and cuts clutter |
| Tray use | Group bottles on a tray | Easy wipe-down and neat display |
| Weekly reset | Purge, combine, rotate backups | Keeps cabinet useful and light |
Budget-Friendly Tiny Sink Storage Under $25 That Works in Rentals
D. Simple dollar-store finds and a few smart hooks can cut clutter fast in any apartment.

Quick wins under $25 focus on renter-friendly, no-drill fixes that keep daily products reachable and counters clear.
Clear bins for grouped categories
Buy lidded or lipped clear bins from the dollar store to group cotton, razors, and travel toiletries. Look for a stable base, a rim you can grab, and sides tall enough to stop tip-overs.
Why it works: grouped bins prevent small items like samples and single-use products from becoming a loose pile.
No-drill hooks and compact racks
Use over-the-door hooks or small rack solutions for towels and hair tools. They keep heat tools off counters and free up cabinet floor space.
Keep rules simple: unplug and cool tools before storing and don’t hang anything that blocks the door closure.
Repurposed vessels for countertop micro-organization
Clear yogurt jars, mugs, or vintage glassware make tidy homes for toothbrushes, makeup brushes, and other small items. They look intentional and cost nothing if you already own them.
Best for: studios get the biggest lift from door-mounted ideas. Shared bathrooms benefit from labeled category bins to reduce mix-ups. If you lack cabinets, pair one small lidded bin on the counter with a door hook for towels to clear the wash area.
Smart Upgrades Under $50 for Small-Space Bathroom Storage
Spend less than $50 and add practical pieces that tame clutter without drilling or long installs. These renter-friendly upgrades focus on usefulness over hype. They work in a small bathroom, fit behind doors, or hide under a pedestal.

Stackable mini drawers
Why try them: Stackable drawers add layers so you can separate toiletries and cleaning supplies without adding shelves or drilling. They keep categories visible and reachable.
How to pick: measure around plumbing first. Leave room for the drain curve and shutoff valves so a drawer does not block access.
Tinted or semi-clear canisters
Choose tinted canisters for cotton rounds, swabs, and hair ties. They reduce visual clutter while still letting you identify contents.
Velcro sink-skirt kits
A Velcro skirt hides the area under a pedestal or an open cabinet. It’s an instant, washable cover that keeps things out of sight and looks tidy.
- Pros: drawers create categories; canisters look calm; skirts hide clutter.
- Cons: stacked drawers can tip if overloaded; canisters need refilling; skirts require occasional washing.
- Best for: one-person small bathrooms can stay minimalist; shared bathrooms should use labeled drawers or separate pieces.
Quick alternative: if you already have stable shelves, use fewer stacked drawers and more low bins to avoid instability. Safety tip: pick non-slip bases and keep heavy bottles at the bottom.
DIY Under-Sink Drawer Unit Using Inexpensive Bins and Scrap Wood
A small DIY box with runner slats turns inexpensive bins into pull-out drawers you can remove when you move. This renter-friendly plan keeps daily items neat and leaves plumbing access clear.

Choose bins and plan first
Start bin-first: buy lipped plastic bins so the lip catches on slats and they slide like a drawer. Measure each bin’s width, depth, and lip height.
Build the box and runners
Make the interior width about 1/16″ wider than the bin to avoid binding. Add ~1/8″ for the lip height. Use 1/4–3/8″ plywood slats as runners on both sides.
Use 1/4″ back panel and 1/2–3/4″ sides. Sand edges and test-fit bins before fixing the back panel. Assemble with wood glue and nails or short screws.
Leave functional gaps and safety tips
Keep ~3/4″ vertical gap between bins so tall bottles don’t snag. Don’t block shutoff valves or the drain path. Sand corners, limit weight per drawer, and keep heavier bottles low.
Pros, cons, and renter guidance
- Pros: custom fit around pipes, maximizes cabinet space, removable when you move.
- Cons: takes time to build; hard-surface bins can be harder to clean than store-bought units.
When to buy instead: pick store-made stackable drawers if you need a fast, washable solution or if you dislike woodworking. For flexible ideas that fit other small rooms, see best small kitchen solutions.
Build a Custom Under-Sink Shelf for Tight Spots Beside the Pipe
Find the narrow dead zone beside the pipe and turn it into a useful shelf spot. With a slim shelf you reclaim odd corners that usually sit empty behind the doors.

Measuring the dead zone
Measure the usable width between the drawer unit and the cabinet side. Deduct for the face frame and hinge swing so the piece slides in easily.
Also measure depth and the height of the drain. Mark where the plumbing sits so the shelf legs clear the pipe.
Simple shelf build that fits around plumbing
Cut a top panel and two vertical supports from 3/4″ plywood. Make the top slightly narrower than your usable width so it slides past hinges.
Cut leg notches or set legs forward so they clear the pipe. Glue and nail or screw the pieces together. Place the shelf beside your drawer unit and test for balance.
Why upright shelving helps
Upright bottles tip less and leaks are easier to spot when things sit on a raised surface. A short back panel keeps cans from falling behind the cabinet.
No-tools alternative
If you need zero tools, use a freestanding slim caddy. It slides into the same spot, moves for valve access, and is renter-friendly.
„Sealed wood or wipeable surfaces last longer in damp cabinet spaces.“
Durability tip: seal the wood or use a wipeable laminate so the shelf resists moisture and cleans easily.
For more compact solutions that work with common layouts, see best bathroom space solutions.
Vertical Solutions When Under-Sink Space Is Basically Nothing
When under-cabinet space is blocked by pipes, look up and reclaim vertical real estate instead.

Over-the-toilet shelving
Over-the-toilet shelves turn wasted height into useful zones. Use them for towels, toilet paper, and backup toiletries.
Tip: pick rust-resistant metal or sealed wood and keep heavier items on lower shelves to lower tip-over risk.
Leaning ladder racks
Leaning ladder racks hold towels without wall anchors. They need a small amount of floor space but no drilling.
Pro: renter-friendly and stylish. Con: they can wobble if overloaded. Test stability before use.
Rolling slim carts
Use a rolling slim cart as a move-anywhere bathroom accessories bar. It fits narrow gaps and moves between rooms in shared homes.
Best for: shared bathrooms where people bring personal items to the toilet or sink area.
Wall baskets and removable hooks
Adhesive hooks and wall baskets keep daily tools off the counter and within reach. Label baskets per person in shared spaces to avoid mix-ups.
- When to go vertical: if plumbing or lack of cabinets blocks under-shelf use.
- Who it fits: studios often use one tall unit; one-bedrooms can split backups between closet and bathroom.
Countertop and Tiny Sink Edge Organization Without Losing Wash Space
Reserve a small footprint for daily essentials so the basin stays unobstructed. Keep only what you use each day at the edge. Everything else should lift and move when you clean or if guests need the space.

Soap dish that doubles as a catchall
Pick a shallow soap dish with a lip. It holds soap and corrals small items like lip balm, bobby pins, and hair ties so they don’t slide into the bowl.
Tip: choose a smooth, nonporous material you can rinse quickly after use.
Small canisters to keep cottons dust-free
Use one or two tinted or semi-clear canisters for cotton swabs and rounds. They reduce visual clutter and keep products dry and clean.
Tray styling that helps fast wipe-downs
A single tray groups bottles and makes cleaning easier. Wipe the tray and the counter below it rather than moving many pieces one by one.
Style guideline: favor simple shapes that rinse and wipe easily. Avoid crevices that trap grime.
- Start with a contained place no wider than your hand span.
- Choose durable, rinseable materials for daily use.
- Make everything removable for quick cleaning or when guests visit.
This approach translates to kitchens (soap plus sponge tray) and entryways (tray for keys). For more renter-friendly ideas that fit small rooms, see best laundry room solutions.
Safety and Durability: What to Look for in Small Bathroom Organizers
Choose organizers and finishes that stand up to steam and everyday spills in a small bathroom. Durability keeps the room usable and reduces replacements.

Water resistance and rust-proof finishes
Pick water-resistant materials such as plastic, sealed wood, or powder-coated metal. These surfaces tolerate humidity and clean easily.
Why rust-proof matters: bathrooms stay damp. Cheap metal can flake and stain items. A rust-proof finish saves time and prevents damage.
Tip-over prevention for drawers and freestanding shelves
Don’t over-stack drawers. Keep heavier items on the bottom layer.
Choose wide bases and test for wobble on uneven floors. Secure tall freestanding pieces to the wall if they feel unstable.
Moisture and mildew basics for cabinets and tight spaces
Leave a clear path to the drain and shutoff valves so you can spot leaks quickly. Never block plumbing access with fixed shelving.
Avoid storing damp towels inside closed cabinets. Add airflow when possible and wipe spills right away to stop mildew.
| Safety feature | Best material/finish | Why it matters | Quick check |
|---|---|---|---|
| Water resistance | Plastic, sealed wood, powder-coat | Resists warping and staining | Wipe with damp cloth; no swelling |
| Rust prevention | Stainless steel or treated metal | Stops corrosion in humid rooms | Inspect edges for flaking finish |
| Tip-over safety | Wide base, low center of gravity | Prevents falls and spills | Push test on uneven floor |
| Cabinet access | Removable or open-front pieces | Allows valve and drain checks | Can you reach shutoff in 5 seconds? |
Worth it note: the best solution is the one you actually clean. If a piece is hard to wipe, you will ignore it and problems will grow.
- Practical checklist: water-resistant surfaces, rust-proof finishes, and wipeable designs.
- Space tip: fewer well-placed pieces often beat many small bins you can’t access.
- Safety tip: keep heavy items low and leave plumbing access clear.
Quick Comparison Table: Tiny Sink Storage Solutions by Space Type
You need fast guidance that matches your sink setup and living situation. Below are renter-friendly, no-drill answers and the best picks that give the most space per dollar.

Match solutions to your sink type
| Sink type | Best picks | Why it works |
|---|---|---|
| Pedestal | Velcro sink skirt kit, slim rolling cart, adhesive hooks | Hides items, adds mobile shelves, no drilling |
| Vanity cabinet | Stackable mini drawers or DIY bin-drawer unit, narrow side shelf | Creates pull-out zones around the pipe; keeps valves accessible |
| No cabinets | Over-the-toilet shelves, leaning ladder rack, countertop tray + canisters | Uses vertical height and keeps counters clear |
Best picks by apartment size
| Apartment | Top choices | Quick setup note |
|---|---|---|
| Studio | Over-the-toilet shelves, one rolling cart, wall baskets | Max space per dollar; vertical focus; removable |
| One-bedroom | Vanity drawers or DIY unit, closet backups, tray on counter | Split backups to closet; keep daily items near the basin |
| Shared bathroom | Labeled zones, rolling carts per user, over-toilet shelving | Reduces mix-ups; clear zones for each person |
Most space gained per dollar: for pedestals, a Velcro skirt plus a slim rolling cart. For vanities, a DIY bin-drawer yields custom fit at low cost. For no-cabinet rooms, over-the-toilet shelves give the largest usable area for the price.
Quick setup note: all core recommendations are renter-friendly and require no drilling. They are removable, easy to clean, and keep plumbing access open.
Pros, Cons, and Best-For Guide to the Most Useful Storage Ideas
Match each piece to a use case and you’ll cut clutter fast without permanent changes. Below are clear pros and cons, who each option is best for, and simple alternatives you can choose today.

Under-sink drawers and shelf
Pros: layers, easy categories, faster access to daily items.
Cons: must measure around plumbing and they sit in a leak-risk zone.
Best for: renters with a vanity cabinet who want a removable, custom-fit solution.
Alternative: a slim freestanding shelf if you prefer zero build work.
Over-the-toilet organizers
Pros: big storage gain, ideal for towels, toilet paper, and backups.
Cons: needs stability and can look crowded without labels.
Best for: bathrooms with limited under-cabinet room that need vertical solutions.
Alternative: wall baskets or a leaning ladder rack for a no-drill option.
Rolling carts and freestanding pieces
Pros: mobile, shareable, no install required.
Cons: needs floor clearance and can collect clutter if unmanaged.
Best for: shared bathrooms or renters who move frequently and need flexible pieces.
Alternative: a narrow fixed shelf if you want less movement.
Countertop canisters, trays, and soap dishes
Pros: daily use stays tidy, and you can wipe surfaces quickly.
Cons: limited capacity and they require routine upkeep.
Best for: small bathrooms where counter real estate is precious and daily access matters most.
Alternative: use a single tray plus wall baskets to shift backups off the counter.
Best place guidance: keep daily items at eye level or the front of a drawer. Put backups higher or farther back. Store cleaning liquids in a contained bin below so spills don’t spread.
| Option | Pros | Cons | Best for / Alternative |
|---|---|---|---|
| Under-sink drawers & shelf | Layering, categories, easy pull-out access | Measure plumbing; leak zone | Best for vanity cabinets / Alternative: freestanding shelf |
| Over-the-toilet organizers | Large vertical capacity, holds towels | Stability needed; can look busy | Best for no-cabinet rooms / Alternative: wall baskets |
| Rolling carts & freestanding pieces | Mobile, no install, flexible | Floor clearance; can gather clutter | Best for shared homes / Alternative: fixed narrow shelf |
| Countertop canisters, trays, soap dish | Daily items tidy; easy wipe-downs | Low capacity; needs routine | Best for small counters / Alternative: tray + wall basket |
Smaller bathrooms should lean on trays and vertical solutions. Larger spaces can split categories across drawers and shelves to keep each place useful. For a quick comparison of budget vs premium picks, see cheap vs premium solutions.
Easy Maintenance Habits for Tiny Sink Storage That Stays Organized
A few simple rituals will stop cabinets from becoming chaotic again. Use short, repeatable steps you can do weekly. This keeps daily life easy and prevents piles from returning.

Labeling and category rules that actually hold up day-to-day
One bin per category. Keep no random extras. Use short labels on the front of bins or drawer faces so you return items quickly.
Refill strategy: front row and backstock
Place daily items in the front row and backups behind them. This prevents overbuying and keeps the counter clear. Swap a backup forward only when the front row is low.
Fast cleaning routine for cabinets, drawers, and bins
Once a week, pull out bins, wipe the cabinet base, and check corners for moisture. Return only what belongs. Do a quick leak check under the drain each week.
| Habit | Action | Why it works |
|---|---|---|
| Labeling | Short labels on bin/drawer fronts | Reduces mix-ups and returns items correctly |
| Refill | Front row daily / back backups | Keeps counters tidy and prevents duplicates |
| Monthly purge | Remove expired or unused products | Frees space so you don’t try to keep everything |
„A small weekly habit beats a long cleanup later.“
Conclusion
Close your project the smart way: plan around plumbing, choose washable materials, and set one quick weekly habit to keep the system working.
Take a renter-friendly approach: measure first, simplify what you keep, and pick removable pieces that match how you get ready each day. Quick buys under $25 give instant grouping and countertop control. Stepping up under $50 adds layered drawers, better canisters, or a sink skirt to hide extras and free more space.
When under-cabinet room is tight, vertical options often yield the biggest gains. Create one daily grab zone and one backup zone so the bathroom stays calm and usable. Pick a single practical solution you will care for.
Safety note: keep valve access clear, prevent tip-overs, and favor water-resistant, wipeable materials. The best storage is the one you will maintain in five minutes a week.